1. Understanding the Custom Apparel Ordering Process at a Glance
Custom apparel ordering covers everything from your first idea to boxes in hand. A typical custom apparel ordering process includes:
- Gathering project details and goals
- Quoting and selecting garments
- Preparing artwork and digital mockups
- Approving proofs and timelines
- Production (printing/embroidery and finishing)
- Shipping or local pickup, plus final checks
When each stage is clear and documented, you avoid preventable problems like rush fees, shipping surprises, or designs that don’t match expectations. According to the U.S. Small Business Administration, building in buffers and planning ahead is key to handling disruptions such as weather or transportation issues in any supply chain.
At Fresh Prints Supply, a standard order flows from a detailed quote, to artwork and proofing, to production, then to organized pickup or shipment. Throughout this playbook, you’ll see how each of those stages works and what information we need from you at each step.
Use this as your roadmap whenever you start a new custom apparel ordering process so every project feels predictable and repeatable.
2. Step 1: Clarify Project Goals Before You Request a Quote
Every strong order starts with a clear purpose. Before you ask for pricing, get specific about why you’re ordering merch. Is it for:
- A one‑day event or conference
- Team uniforms or spirit wear
- Retail or brand merchandise
- A fundraiser or giveaway
Purpose shapes everything from garment choice to print method and budget. Professional event planners often start planning “months or even years ahead of time,” according to the U.S. Bureau of Labor Statistics, and comprehensive event guides emphasize clearly defining goals and allowing enough planning time for all major elements like location, transportation, and decorations (University of Wisconsin–Madison). Your merch deserves the same early, intentional planning.
Before requesting a quote, decide:
- Quantities and size breakdowns (e.g., S–3XL)
- Garment type (tee, hoodie, performance wear, tote)
- Garment and print colors
- Budget range
- Realistic in‑hands date (the latest you must have items)
Your in‑hands date drives the entire custom apparel order process. Share the true deadline—then identify must‑haves (brand colors, quality level, firm date) versus nice‑to‑haves (extra print locations, specialty finishes) so your printer can tailor options to your budget.
3. Step 2: Request a Custom Apparel Quote That Matches Your Needs

A detailed quote request saves time and prevents surprise costs. When you request a custom apparel quote, include:
- Project overview (who it’s for and how garments will be used)
- Artwork status (final, needs tweaks, or still an idea)
- Quantities and sizes
- Garment preferences (e.g., basic tee vs premium blend)
- Print locations (front, back, sleeve, inside neck, etc.)
- Deadline/in‑hands date and event date
Pricing is driven mainly by:
- Garment type and brand
- Number of print colors per location
- Number of print locations
- Turnaround time and any rush requirements
Expect two types of numbers:
- Ballpark estimate: Based on rough info; good for early budgeting
- Formal quote: Based on specific details; used to approve the order
The more precise your specs, the closer your estimate will be to the final invoice. Fresh Prints Supply can also suggest cost‑saving options, such as alternate garments, simplifying color counts, or adjusting quantities for price breaks.
4. Step 3: Choose Garments, Print Methods, and Finishing Options
Choosing the right garments and print methods is where your vision becomes something people can hold and wear.
Garment types:
- Basic tees: Budget‑friendly, ideal for large events and giveaways
- Premium tees: Softer feel, great for retail or staff uniforms
- Hoodies and sweatshirts: Higher perceived value, ideal for cooler seasons
- Performance wear: Good for sports, outdoor events, or active staff
- Totes and accessories: Perfect add‑ons for conferences or retail bundles
Print methods:
- Screen printing: Ink is pushed through a mesh stencil, creating bold, vivid prints. Because the ink layer is relatively thick, screen prints are durable and hold up well to repeated washing on textiles, according to RMIT University.
- Embroidery: Thread stitched into the garment; a polished, dimensional look ideal for logos on polos, hats, and outerwear.
- DTG (direct‑to‑garment): A digital method that allows high‑resolution, full‑color imagery with a softer feel, though the ink layer can be thinner than screen printing, which may affect durability depending on use and care (Fashion Institute of Technology).
Add‑ons like tag printing, folding, and individual bagging can elevate presentation for retail or events. When weighing screen printing vs embroidery, balance the expected lifespan of the item, your brand aesthetic, and your budget.
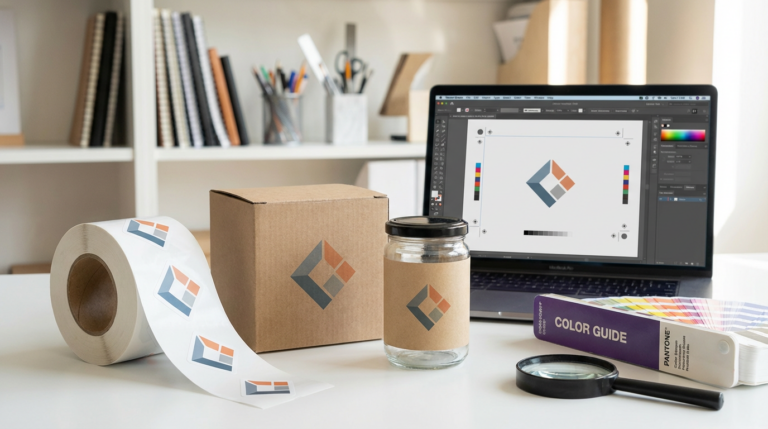
5. Step 4: Prepare Artwork Using Print‑Ready Design Best Practices
Strong artwork is essential for strong apparel. Whenever possible, provide:
- Vector files (AI, EPS, SVG, or PDF with vector art)
- Or high‑resolution raster images (usually 300 dpi at print size)
According to the University of Michigan Library, low‑resolution images can look fine on a screen but appear jagged or blurry when printed at larger sizes. Vector graphics are ideal for logos because they’re based on mathematical formulas and can be scaled up or down without loss of quality. That makes them perfect for designs that must work across multiple garments and sizes.
Key design considerations:
- Print size and placement: Make sure your logo or message is large enough to read at a glance.
- Color contrast: Use light ink on dark shirts or the reverse to keep text and logos legible.
- Simplified color palette: Fewer colors often mean lower cost and cleaner prints.
- Readable typography: Avoid ultra‑thin fonts or tiny details that may fill in or disappear.
If you don’t have print‑ready files, Fresh Prints Supply can help refine or recreate artwork based on your concept or existing assets, guided by print-ready artwork guidelines.
6. Step 5: Plan a Realistic Custom Apparel Timeline
A smooth project depends on realistic timing. A typical custom apparel timeline includes:
- Quoting and garment selection
- Artwork preparation and proofing
- Approval and payment/deposit
- Production (ordering blanks, printing/embroidery, finishing)
- Shipping or pickup
Production timelines usually start after you approve the proof and submit any required deposit, not from the first email. Standard screen printing turnaround times vary based on design complexity, volume, and the shop’s production schedule.
According to the U.S. Small Business Administration, disruptions like natural disasters, transportation issues, and supplier delays are common in supply chains, so businesses should build resilience with contingency plans. MIT OpenCourseWare notes that using time buffers in planning helps protect against uncertainty and missed deadlines.
When you map out your custom t-shirt printing timeline:
- Share your firm in‑hands date upfront
- Build in extra days for proof revisions and approvals
- Add shipping time plus a buffer in case of carrier delays
This planning reduces stress and the likelihood of needing costly rush options.
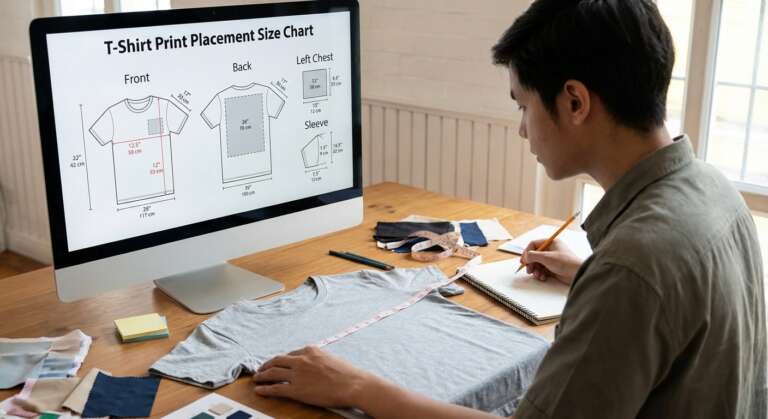
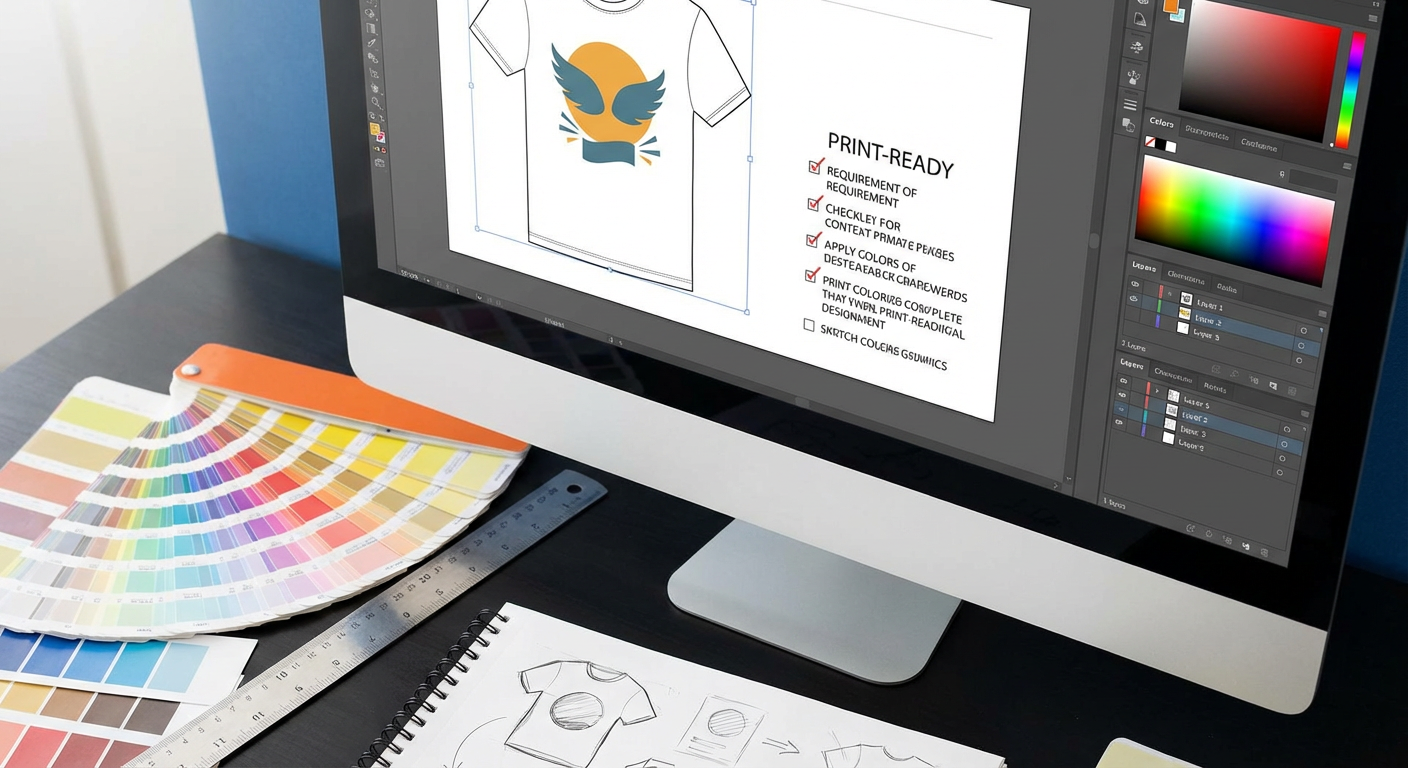
7. Step 6: Review Digital Proofs and Approvals Carefully
Digital proofs are your last chance to confirm that what you imagined is what will be produced. A typical custom merch proof shows:
- Artwork on a garment mockup
- Placement (e.g., centered chest, left chest, full back)
- Approximate print size
- Ink colors and garment colors
- Relevant notes or special instructions
When you review a proof, carefully check:
- Spelling and dates
- Logo orientation and placement
- Print size relative to garment
- Colors (keeping in mind screen vs ink differences)
- Garment style, color, and size range
Production typically does not begin until all proofs are approved. Delayed approvals push your delivery date, because your job can’t enter the production schedule until you sign off. To keep things moving:
- Consolidate team feedback into one response
- Be specific about requested changes (e.g., “reduce design width from 12″ to 10″”)
- Approve quickly once everything looks correct
Clear, timely custom merch proof approval is one of the simplest ways to protect your timeline.
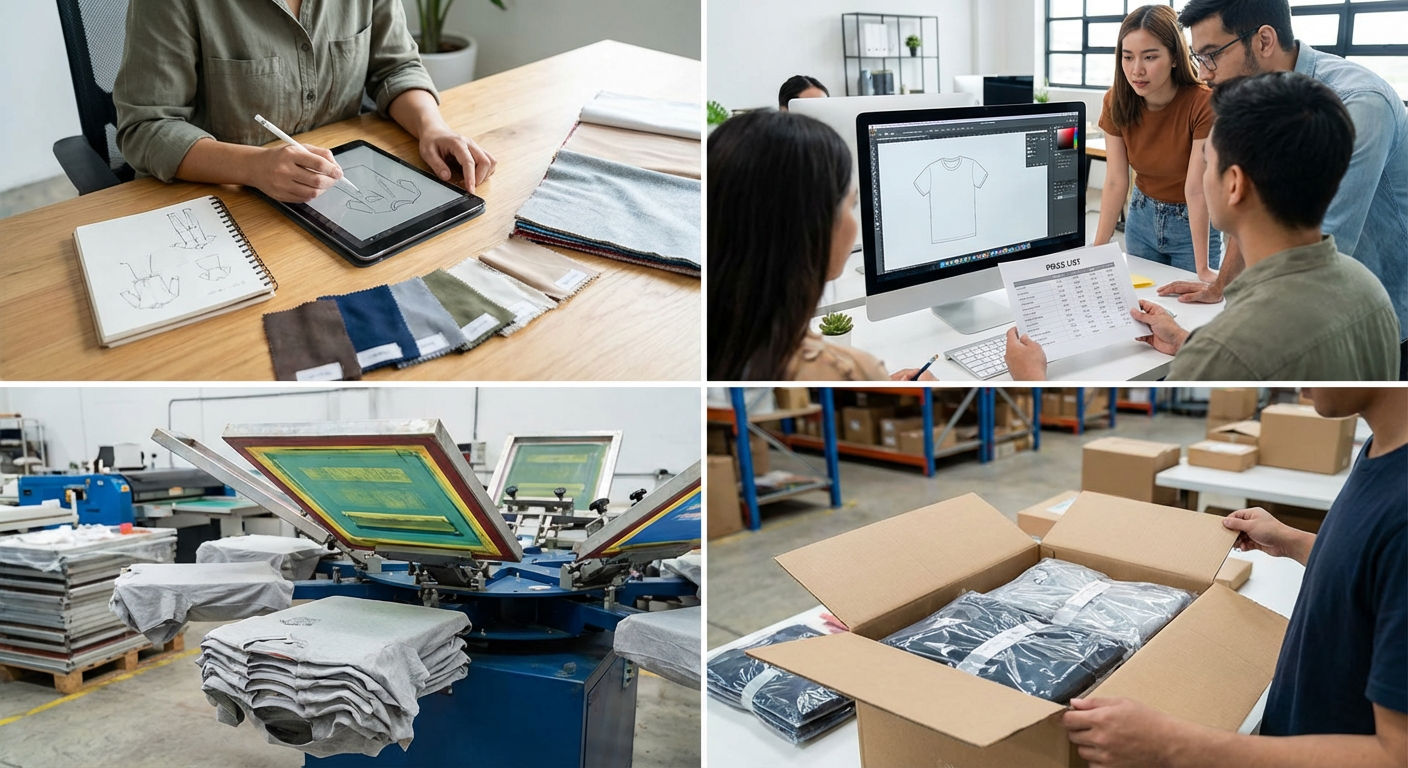
8. Step 7: Understand What Happens in Production After Approval
Once you approve the proof, your order moves into production. Behind the scenes, a typical workflow includes:
- Ordering and receiving blanks in the correct styles, colors, and sizes
- Setting up screens or machines (burning screens, digitizing for embroidery, or preparing DTG files)
- Test prints and color checks
- Full production run
- Quality control checks for print quality, placement within tolerance, and counts
- Folding, packing, and labeling
After production starts, changes become difficult or sometimes impossible without extra cost or delays. The Project Management Institute notes that late scope changes often lead to increased costs and schedule delays because they require rework and resource adjustments. Similarly, U.S. Department of Defense guidance on manufacturing changes explains that change orders introduced after production begins can require rework or scrapping, with substantial cost and schedule impacts.
Expect minor variations between digital mockups and finished garments, especially in color and placement within normal tolerances. Reputable printers like Fresh Prints Supply rely on structured quality checks throughout the screen printing production process to keep results consistent.
9. Step 8: Plan Shipping, Local Pickup, and Order Handling on Arrival
The final step in custom apparel ordering is getting finished merch where it needs to go. As your order wraps up, you’ll choose how to receive it:
- Local pickup: Often fastest and cost‑effective if you’re nearby
- Shipping: Convenient for distributed teams or events; adds carrier transit time and cost
Before your garments leave the shop, confirm:
- Correct shipping address and contact person
- Preferred delivery window or pickup timeframe
- Any special instructions (e.g., ship to hotel, attention line, loading dock details)
When your order arrives, inspect it promptly. The U.S. General Services Administration recommends checking shipments for visible damage, counting items, and comparing them to shipping documents; any discrepancies or damage should be documented and reported immediately. The U.S. Small Business Administration also advises keeping good records of shipping documents and addressing issues quickly to help resolve discrepancies.
Use a simple checklist:
- Count boxes and garments
- Spot‑check sizes and counts
- Review print quality and placement
- Note any visible defects or transit damage
Store garments in a clean, dry area, and keep boxes closed until your event to minimize dust and wrinkles. If you’re planning local order pickup, coordinate timing to align with your event prep.
10. Manage Deadlines and Avoid Custom Apparel Rush Fees
Working backward from your event date is one of the best ways to avoid rush charges. Start with when you must have merch in hand, then build in:
- Shipping or pickup time (plus a buffer)
- Production time
- Proofing and revision time
- Quoting and decision time
Rush work usually costs more. Harvard Business Review points out that overtime and rushing work drive up labor costs and can lead to mistakes and quality issues because there’s less time for careful work. MIT Sloan’s operations management materials similarly note that expediting tasks outside the normal schedule often requires re‑prioritizing resources and can disrupt other jobs, adding cost.
To minimize rush fees:
- Share your true in‑hands date early
- Let your printer know when decision‑makers will be available for approvals
- Avoid last‑minute artwork changes
- Create an internal deadline that’s a few days earlier than your actual event
Understanding your printer’s rush order policies helps you decide when paying more for speed is worth it—and when a slightly earlier start would save money.
11. Avoid Common Custom Apparel Ordering Mistakes
Certain pitfalls show up again and again in custom apparel ordering. Watch for:
-
Vague specs: Missing details on garment type, colors, or print locations lead to inaccurate quotes.
- Fix: Use a written spec sheet and confirm every field before requesting pricing.
-
Late approvals: Slow responses to proofs or invoices push production back.
- Fix: Schedule internal review time and designate a final decision‑maker.
-
Last‑minute design changes: Adjustments after approval can trigger rework and delays. According to the Project Management Institute and U.S. defense manufacturing guidance, late changes in production typically increase cost and extend timelines because work must be redone or scrapped.
- Fix: Finalize artwork internally before submitting it and treat proof approval as a firm checkpoint.
-
Underestimating sizes or quantities: Running out of key sizes hurts your event or team rollout.
- Fix: Use a size breakdown checklist and get accurate counts from teams or registration forms.
-
Unclear delivery details: Wrong addresses or missing contacts cause delivery headaches.
- Fix: Confirm delivery or pickup details in writing.
Clear documentation at each stage of the custom apparel order mistakes process is the best insurance against these problems.
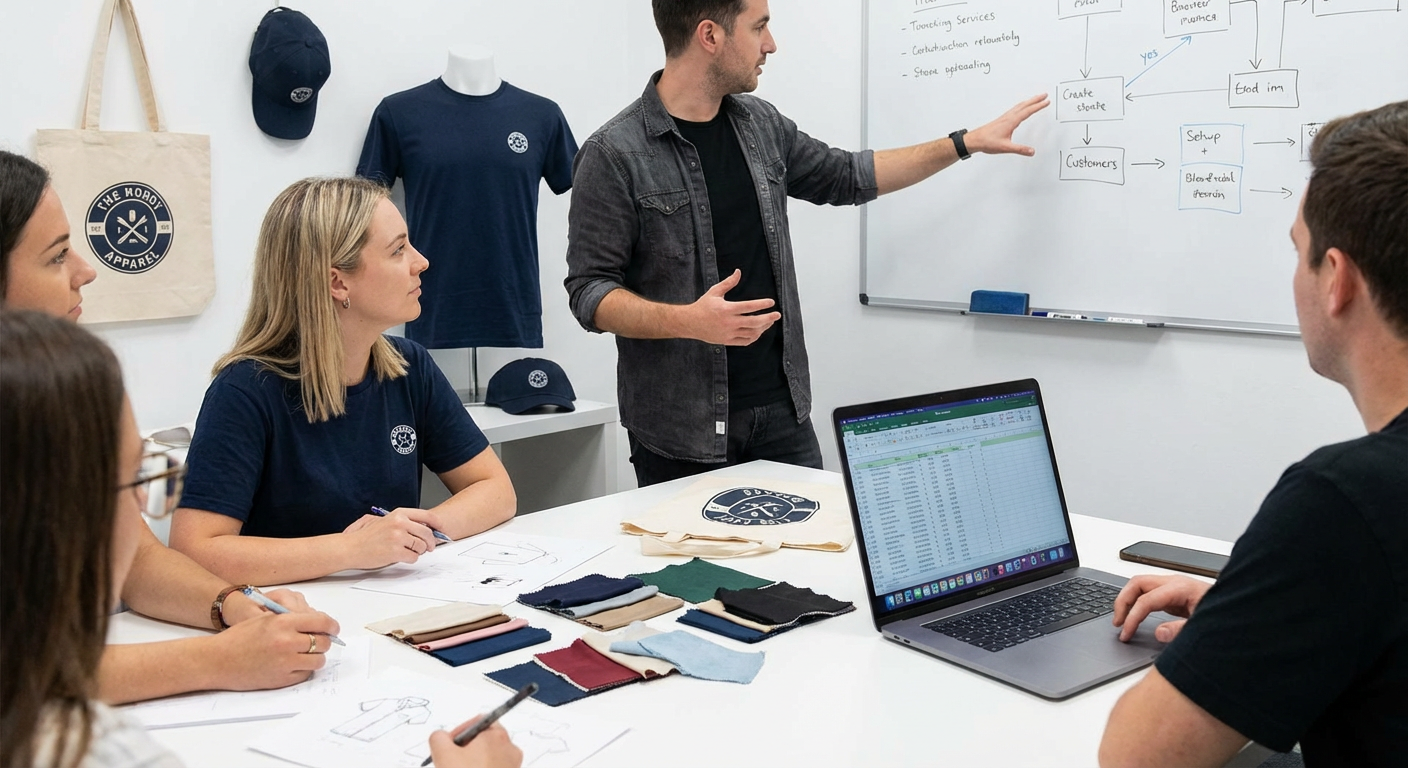
12. Collaborate Smoothly With Your Custom Apparel Print Partner
Strong results come from strong partnerships. Treat your printer as a strategic partner, not just a vendor. They can only be as effective as the information you provide. Share:
- Project goals and audience
- How and where garments will be used
- Budget range and quality expectations
- Firm dates and any hard constraints (e.g., venue access times)
Ask proactive questions about material options, print durability, and care instructions so your merch performs well over time. Harvard Business Review reports that companies with deep, collaborative supplier relationships see higher quality, more reliable delivery, and more innovation compared with purely transactional relationships. The Chartered Institute of Procurement & Supply similarly notes that open communication and long‑term partnerships can improve performance and reduce risk.
By building a long‑term relationship with one custom apparel partner, you gain:
- Saved specs and artwork for faster reorders
- Consistent quality and colors across seasons
- Faster quoting and more tailored recommendations
Fresh Prints Supply supports clients through every step of the work with a custom apparel printer journey with clear communication, structured proofing, and guidance from quote to delivery.
13. Quick Checklist: Custom Apparel Ordering From Quote to Pickup
Use this checklist as your compact custom apparel ordering roadmap. Copy, print, or save it for your next project.
-
Define goals and deadlines
- Clarify purpose (event, team, retail, fundraiser)
- Set real in‑hands date and internal buffer date
-
Gather project details
- Quantities and size breakdown
- Garment type and colors
- Budget range and must‑haves
-
Prepare artwork
- Collect vector or high‑resolution files
- Finalize design internally
-
Request a quote
- Provide full specs and timeline
- Review options and select garments/print methods
-
Approve quote and pay deposit
- Confirm quantities, pricing, and turnaround
-
Review and approve proofs
- Check spelling, placement, colors, and garments
- Consolidate feedback and approve promptly
-
Production
- Understand that changes now may add cost and time
-
Plan shipping or pickup
- Confirm address or pickup window and contact
-
Receive and inspect order
- Verify counts, sizes, and print quality
- Report any issues quickly
Keep this custom apparel ordering checklist handy so each new project follows the same reliable steps.
14. Turn Every Custom Apparel Order Into a Smooth, Repeatable Process
When you understand how quoting, artwork, proofs, production, and pickup fit together, custom apparel ordering becomes predictable instead of stressful. Thoughtful planning, realistic timelines, and clear approvals keep you away from unnecessary rush fees and last‑minute fire drills.
Use this playbook and checklist as your template: start by defining goals, gather complete specs, approve proofs carefully, and build in buffer time for production and delivery. According to supply‑chain and operations guidance from organizations like the SBA and MIT, those buffers and clear processes are what protect timelines and quality when something unexpected happens.
For your next project, share your details with Fresh Prints Supply early in the process. We’ll help you refine specs, choose the right garments and print methods, and navigate every stage of this custom apparel ordering playbook so your merch arrives on time, on budget, and ready to impress.